Introduction
Imagine holding a design in your hands — not the actual paper or screen, but the visual composition itself. If the design were a physical object, would it feel balanced, or would it tip toward one side? This intuitive sense of visual mass, of some elements feeling heavy and others feeling light, is what designers mean when they talk about visual weight. It is one of the most important and nuanced principles in graphic design, governing how compositions feel balanced, how elements communicate importance, and how the viewer’s eye is guided through a design.
Visual weight is the perceived heaviness or lightness of an element within a design composition — its ability to attract the viewer’s attention and command visual space relative to surrounding elements. Unlike physical weight, visual weight is not determined by actual mass but by visual characteristics: color, size, texture, shape, and placement all affect how much visual weight an element appears to have. A small dark circle can carry more visual weight than a large light rectangle; a single bright red element can outweigh a dozen gray elements of the same size.
Understanding visual weight is essential because it underlies two of the most critical principles in design: balance and emphasis. Balance is achieved by distributing visual weight evenly throughout a composition; emphasis is achieved by concentrating visual weight on a single focal element. Every composition decision you make — every color, shape, size, and placement choice — changes the visual weight distribution of your design and therefore its balance and hierarchy.
In this article, you will learn exactly what visual weight is and what factors determine it, the different types of visual balance it creates, iconic examples from professional design, and practical techniques for using visual weight to create compositions of exceptional power and refinement.
What Is Visual Weight in Graphic Design?
Visual weight is the perceived importance and visual presence of an element within a composition — how much it “weighs” on the viewer’s eye relative to its surroundings. It is a metaphorical extension of physical weight into the visual realm: just as we perceive some physical objects as heavier than others, we perceive some visual elements as more dominant, more present, and more demanding of attention than others.
The concept emerged from the principles of Gestalt psychology in the early 20th century and was systematized in design theory through the work of Rudolf Arnheim, whose influential book “Art and Visual Perception” (1954) provided one of the first rigorous analyses of how visual weight operates in composition. Arnheim showed that viewers respond to visual compositions in ways that parallel the physical experience of gravity and balance — we instinctively sense when a composition is visually “heavy” on one side, and this sense of imbalance creates visual tension that can be exploited deliberately or resolved for harmony.
Visual weight fits within the broader design system as the mechanism through which balance and emphasis are achieved. It is the underlying force that design principles like contrast, scale, and color manipulation. When a designer makes an element larger, darker, or more saturated, they are increasing its visual weight. When they add whitespace around an element, reduce its saturation, or make it lighter, they are decreasing its visual weight. Every design decision is, at some level, a visual weight decision.
Factors That Determine Visual Weight
Size
Size is the most direct and predictable determinant of visual weight: larger elements appear heavier than smaller elements of the same type and color. A large circle is visually heavier than a small circle; a large block of text carries more visual weight than a single line. This relationship between size and visual weight is fundamental to hierarchical design — making the most important element the largest ensures it carries the most visual weight and commands the most attention.
However, size is always relative. A large element in a composition filled with even larger elements may appear visually light; a small element in a composition of tiny elements may appear very heavy. Size contributes to visual weight only in relation to the other elements in the composition and the overall space of the canvas.
Color and Value
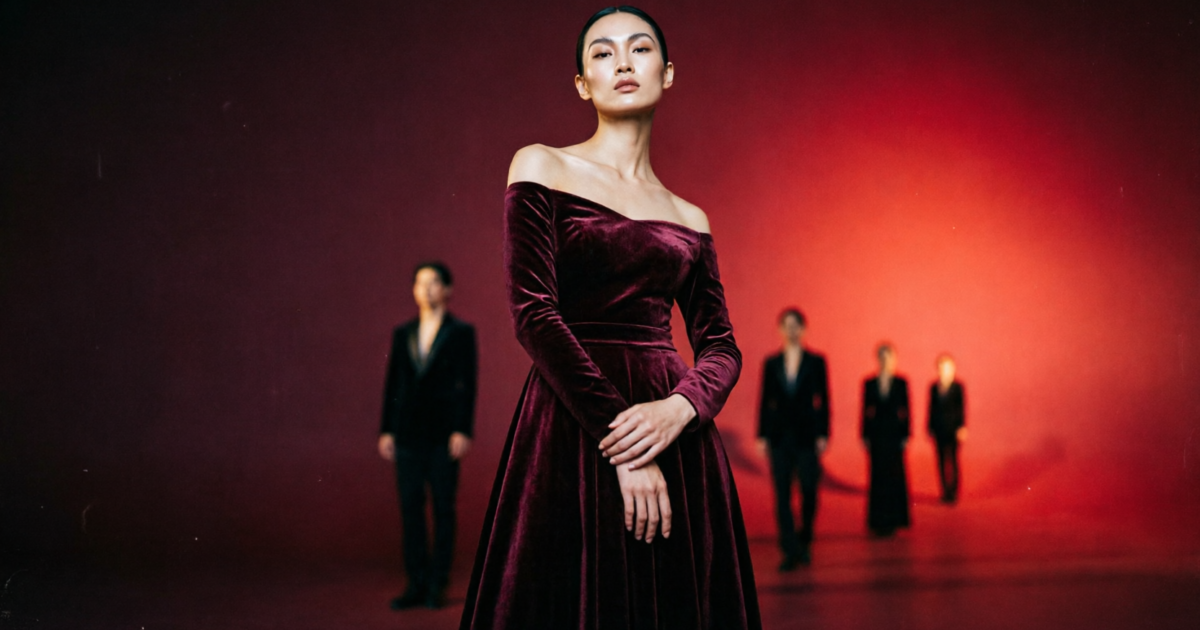
Color profoundly affects visual weight through two mechanisms: value (lightness versus darkness) and saturation (intensity of hue). Dark elements appear heavier than light elements of the same size — a black circle weighs more than a white circle of identical dimensions. Saturated, intense colors appear heavier than desaturated, muted versions of the same hue — a vivid red rectangle weighs more than a dusty rose rectangle of the same size.
Warm colors (reds, oranges, yellows) generally appear slightly heavier and more advancing than cool colors (blues, greens, purples) of equivalent value. This warm-cool weight differential is why warm-colored elements tend to appear in the foreground of compositions and cool elements tend to recede into the background. Designers use this phenomenon deliberately to create spatial depth and directional visual weight distribution.
Texture and Detail
Highly textured or detail-rich elements appear visually heavier than smooth, simple elements. A rough stone texture weighs more than a smooth gray surface; a detailed photograph weighs more than a flat color block of the same area; a complex pattern weighs more than a simple solid. This is because texture and detail demand more visual processing — the eye spends more time in high-detail areas, experiencing them as more substantial and weighty.
Designers use texture to add visual weight without increasing size or changing color, which is particularly useful when physical size constraints limit scale options. A subtle texture added to a background element can significantly change the weight distribution of a composition without altering any element’s dimensions.
Shape and Form
Different shapes carry different visual weights even when their areas are identical. Irregular, complex shapes tend to appear heavier than simple, geometric ones. Compact shapes (circles, squares) appear heavier than extended shapes (rectangles, horizontal bars) of the same area. Shapes that point toward a focal element seem to direct their weight toward that element; shapes that point away seem to deflect weight toward the edges of the composition.
The position of a shape within the composition also affects its apparent weight: elements positioned in the upper half of a composition appear lighter than elements in the lower half (because upper placement contradicts expected gravitational behavior, creating visual tension); elements positioned in the center appear heavier than those at the edges; elements at the right of a composition appear slightly heavier than those at the left in left-to-right reading cultures.
Real-World Examples of Visual Weight
The FedEx Logo
The FedEx logo achieves perfect visual weight balance through deliberate color and scale relationships. The purple “Fed” and the orange “Ex” are sized and colored to create equal visual weight on each side of the letterform sequence — the darker purple carries weight that the lighter but warmer orange matches, creating a logo that feels centered and stable despite using two very different colors. The famous hidden arrow in the negative space of the “E” and “x” also uses weight precisely: the arrow reads as weightless, giving it the visual lightness of a directional signal rather than the mass of a structural element.
Paul Rand’s IBM Logo
Paul Rand’s horizontal-stripe IBM logo is a masterclass in visual weight management. The precisely calculated weight of the blue stripes against the white negative space creates a mark that is visually balanced at every scale, from business card to building signage. The stroke weight of the stripes is calibrated to maintain the letter legibility while creating the distinctive textured appearance that carries strong visual presence. Rand’s mastery of visual weight allowed him to create logos that were simultaneously distinctive and visually stable across decades and across every application.
Saul Bass Film Titles
Saul Bass, the legendary film title designer whose work appeared in classics like Vertigo, Psycho, and The Man with the Golden Arm, used visual weight as his primary compositional tool. His title sequences place simple, bold graphic elements — often a single arm, a diagonal, a typographic form — in precisely calibrated weight relationships with their backgrounds and with the letterforms of the title text. The result is compositions of remarkable tension and energy that hold the eye effortlessly even in their animated simplicity.
Swiss Modernist Posters
The Swiss International Style produced posters by designers like Armin Hofmann and Josef Müller-Brockmann that use visual weight with mathematical precision. Photography or illustration elements are positioned and scaled to create exact visual weight relationships with typographic elements, creating compositions in which the total visual weight is distributed symmetrically or deliberately asymmetrically to create specific emotional effects. These posters continue to be studied as exemplary models of visual weight mastery.
How to Apply Visual Weight in Your Designs
- Audit the visual weight of every element before finalizing placement. Before locking any layout, evaluate each element’s visual weight by asking: how dark is it? How large is it? How detailed is it? How saturated is its color? Assign each element a rough weight ranking (heavy, medium, light) and then assess whether the total weight distribution across the composition matches your intended balance and hierarchy.
- Use dark values and saturated colors to increase weight. When an element needs more visual presence without being made larger, increase its visual weight through color — make it darker, more saturated, or warmer in hue. Conversely, reduce an element’s visual weight by making it lighter, more desaturated, or cooler without changing its size.
- Balance weight asymmetrically using the lever principle. In asymmetric compositions, achieve visual balance by placing a large light element on one side and a small heavy element on the other — just as a large child and a small adult can balance a seesaw by adjusting their distances from the center. A large area of light whitespace can balance a small area of heavy dark color. This is asymmetric balance, and it creates compositions of far more visual interest than simple symmetric arrangements.
- Use texture to add weight without changing dimensions. When size constraints prevent you from scaling an element up but you need more visual presence, add texture or detail to increase its perceived weight. Even a subtle paper texture on a flat color element can significantly increase its visual weight and presence.
- Position heavy elements strategically. Place your visually heaviest element — typically your primary focal element — where you want the viewer’s eye to spend the most time. Use the weight distribution of surrounding elements to guide the eye toward this primary weight and then hold it there through the clarity and importance of the content at that focal point.
- Test balance by flipping the composition. View your design horizontally mirrored (most design software can do this). Imbalances that your eye has grown accustomed to in the correct orientation often become immediately obvious in the mirrored view. Use the mirrored view to identify weight distribution problems and then return to the correct orientation to fix them.
Common Mistakes to Avoid
- Unintentional top-heaviness: Placing all significant visual weight in the upper half of a composition without a grounding element in the lower half creates a composition that feels unstable and about to topple. Fix: place a significant element or larger area of weight in the lower portion to anchor the composition.
- Using only size to control weight: Many designers default to making important elements larger without considering color, texture, and value as weight tools. This limits the compositional options available. Fix: experiment with increasing color weight (darker, more saturated) as an alternative or supplement to size increases.
- Symmetric weight distribution that feels static: Perfect left-right symmetry creates visual weight balance but often feels boring and lacking in energy. Fix: use asymmetric balance — different types and quantities of weight on each side that create dynamic tension while maintaining overall equilibrium.
- Ignoring the weight of whitespace: Whitespace is not weightless — it carries visual weight that affects the overall balance of a composition. A large area of white space on one side of a composition must be balanced by an equivalent weight (typically darker or more textured elements) on the other. Fix: consider whitespace as an active compositional element with its own visual weight, not as an absence of design.
- Competing focal points of equal weight: Two elements of equal visual weight in different parts of a composition create visual tension without resolution, dividing the viewer’s attention and preventing clear emphasis. Fix: deliberately reduce the weight of one element to establish a clear primary-secondary hierarchy.
Visual Weight Across Design Disciplines
UI/UX Design: Visual weight in interface design determines which interface elements appear most interactive and important. Primary buttons carry more visual weight than secondary buttons; the main content area carries more weight than the sidebar; the header carries weight that anchors the entire page. Consistent visual weight hierarchies create interfaces that users understand intuitively, without explicit instruction.
Branding and Logo Design: Logo visual weight must be calibrated for stability at all scales. A logo that appears balanced at business card size may become top-heavy or bottom-heavy at large format. Visual weight must be tested at every intended use scale during the design process.
Print and Editorial Design: Page layouts use visual weight distribution to create either formal balance (symmetric, authoritative) or informal balance (asymmetric, dynamic) that communicates the personality and editorial stance of the publication.
Environmental and Wayfinding Design: Visual weight in wayfinding systems must work under a wide range of lighting conditions, viewing distances, and environmental contexts. High-contrast, high-weight treatments are used for critical wayfinding information to ensure it carries sufficient visual presence to be found immediately in visually complex environments.
Quick Reference Checklist
- Visual weight of every element is assessed before finalizing the layout
- Dark, saturated, warm-colored elements are placed intentionally, not arbitrarily
- Balance is achieved through deliberate weight distribution — not necessarily symmetry
- The primary focal element carries the highest visual weight in the composition
- Whitespace is treated as an active element with its own visual weight
- No two elements of equal weight compete for the viewer’s attention
- Balance is tested at actual output dimensions, not only on screen at design resolution
- The composition passes the flip test — imbalances are visible when mirrored horizontally
Conclusion
Visual weight is the invisible physics of graphic design — the force that governs how compositions feel, how they balance, and how they direct attention. By understanding and deliberately controlling the visual weight of every element in your compositions through the tools of size, color, value, texture, and placement, you gain the ability to create designs that communicate with precision, feel balanced with intention, and guide the viewer’s eye with confidence. Weight is power; used skillfully, it is one of the most expressive tools in the entire graphic design vocabulary.
To deepen your understanding of related principles, explore these articles: